Clicking on the Location option brings up a window listing all saved Locations on your account.
A Location is a specified position saved on the map. In the TeMeDa app, a Location can be a circle or a polygon. Locations can be viewed in the Accordion in the TeMeDa app or by selecting Locations from under Admin in the Main Menu at the top of the screen. Locations help identify a starting or destination point and help manage the activity of Users and Assets.
Adding a Location
To create a new Location, click the Add Location button at the top of the Locations window.
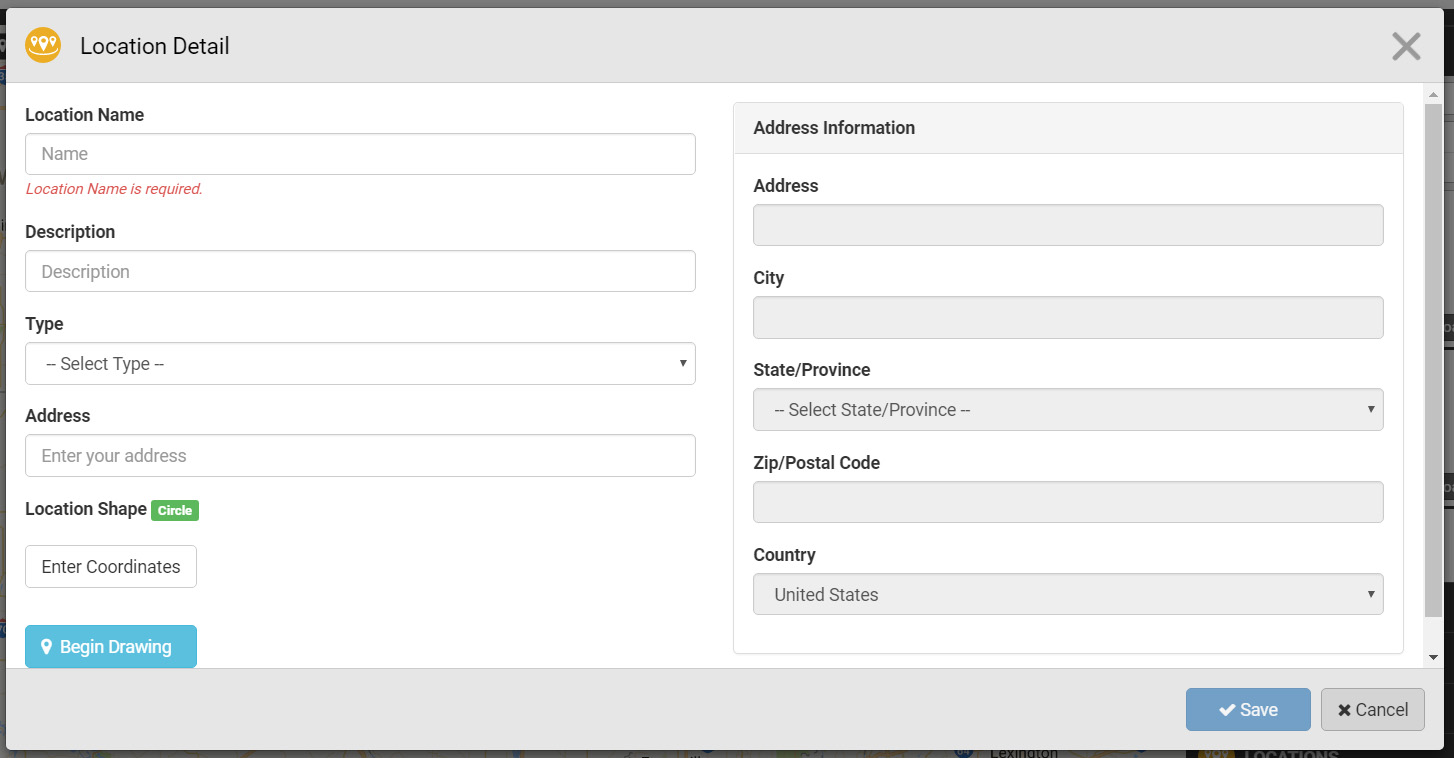
The Add Location window requires a Location Name and a Location Shape to be saved.
Enter the Location description, chose a Location Type and Address if you desire.
If you know the coordinates of the Location you want to add, click on the Enter Coordinates button and it will show fields for Latitude and Longitude. Enter the coordinates and press the Set Coordinates button. This will update the Address field to match the location found.
To Draw the Location, click the Begin Drawing button. If you entered coordinates using the ‘Enter Coordinates’ option, you will be brought to a map will be centered on the location you specified. Once at the map view, you can Draw either a Circle or a Polygon Location.
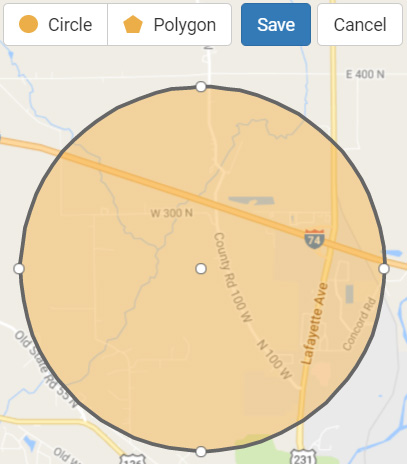
With the Circle tool, you can drag and drop the circle to be any size you need. The Polygon tool allows you to draw the exact shape you need to create the Location. Once you have the shape of your Location drawn, clicking the save button at the top of the map will return you to the Add Location window.
The Address information will be automatically entered after drawing the Location.
When you’re done entering all of your information and ready to declare the Location complete, click the Save button in the bottom right corner of the window.
Editing a Location
Editing a Location works very similarly to adding a Location. To edit a Location, click on the pencil icon to the right of the Location you wish to modify.
In the Location Detail window, you have many of the same options as the Add Location window. You can change the Location Name, Description, Type, and/or you can redo the Location.
Once your changes are complete, click the Save button in the bottom right corner of the window.
Deleting a Location
From the Locations window, you can delete a saved Location by clicking the “‘x’ with a circle around it” icon on the right of the Location’s row. Once you confirm that you want to delete the Location, it will be removed from the system.
Exporting Locations
You can export Locations as comma-separated values by clicking the Export Data button on the Locations window.
Toggle Locations Active or Inactive
You can set Locations as Active on Inactive. Only active items will show in the Accordion and Alerts. Inactive items will still show up on the Admin Menu so that they can be re-activated or deleted. This allows customers to keep all Locations in the system but to activate only those items in use to keep the user interface clean and un-cluttered.